Employee List
The Employee List feature in Mini Gift helps manage all personnel of the store/branch, including account information, roles, working branch, and work schedule. This is an important feature for operational permission assignment, personnel management, and accurate work schedule setup.
1. Accessing the Employee List
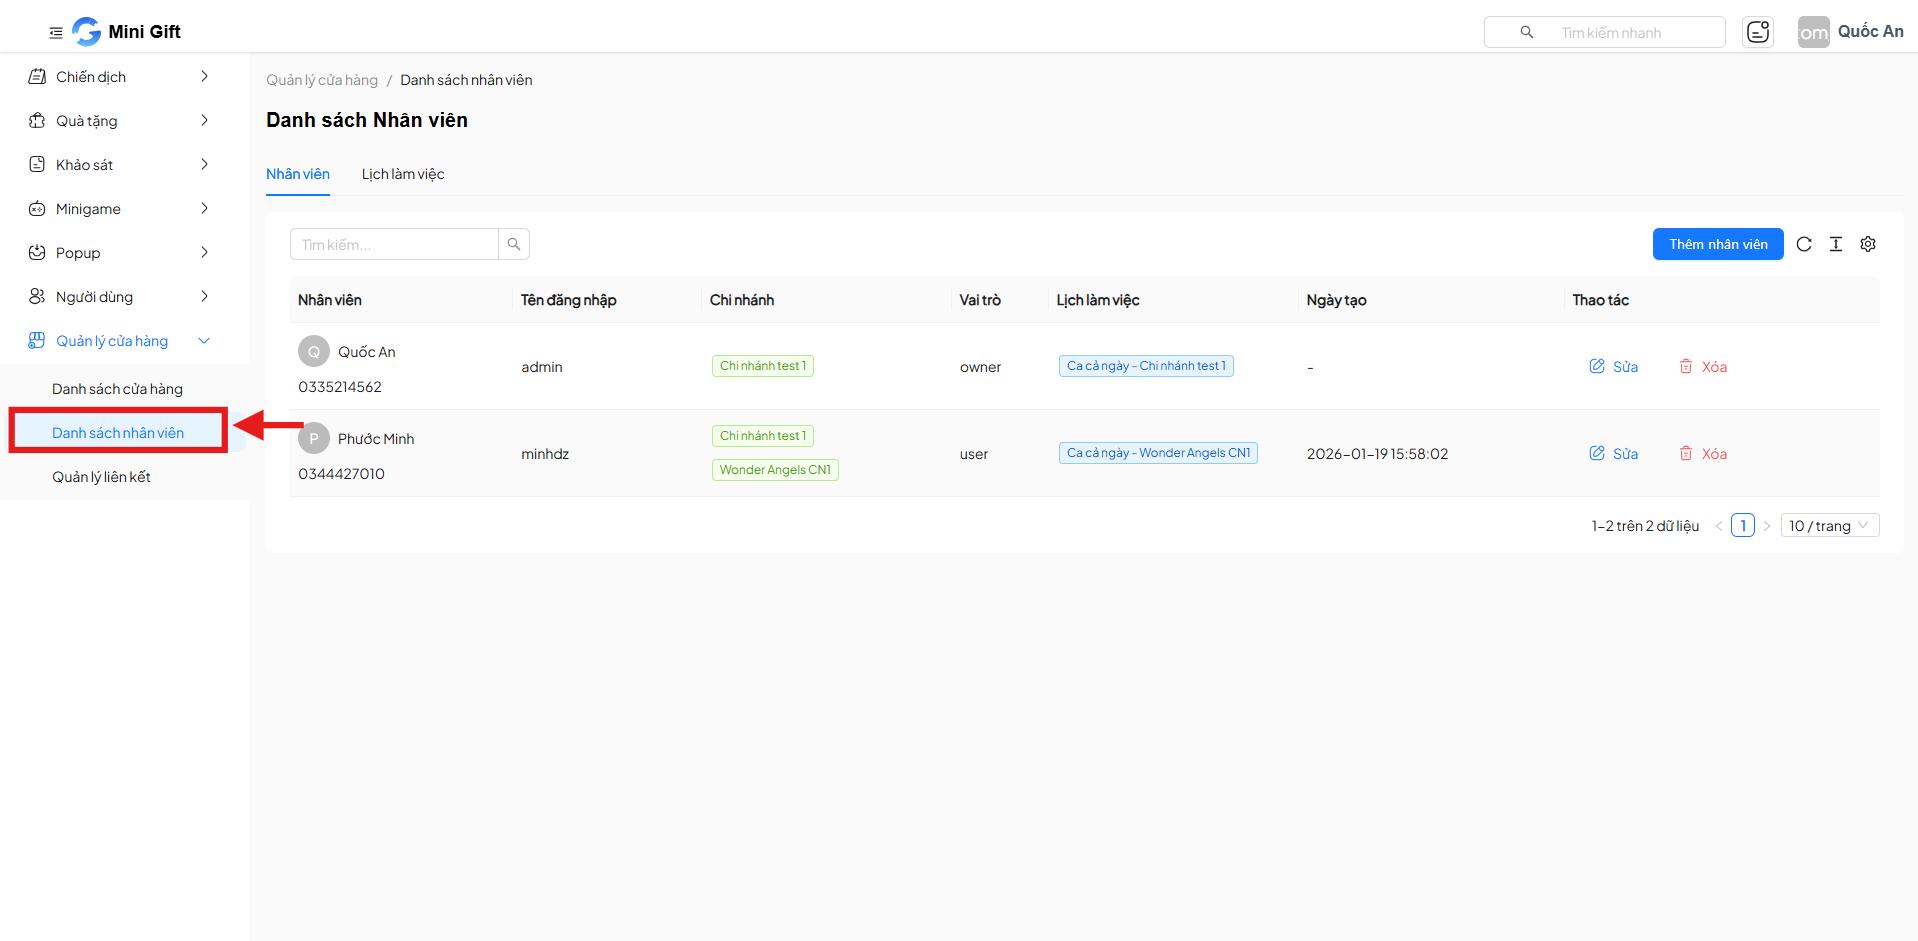
From the left menu, follow the path:
Store Management → Employee List
The screen displays the complete list of employees created in the system.
2. Managing the Employee List
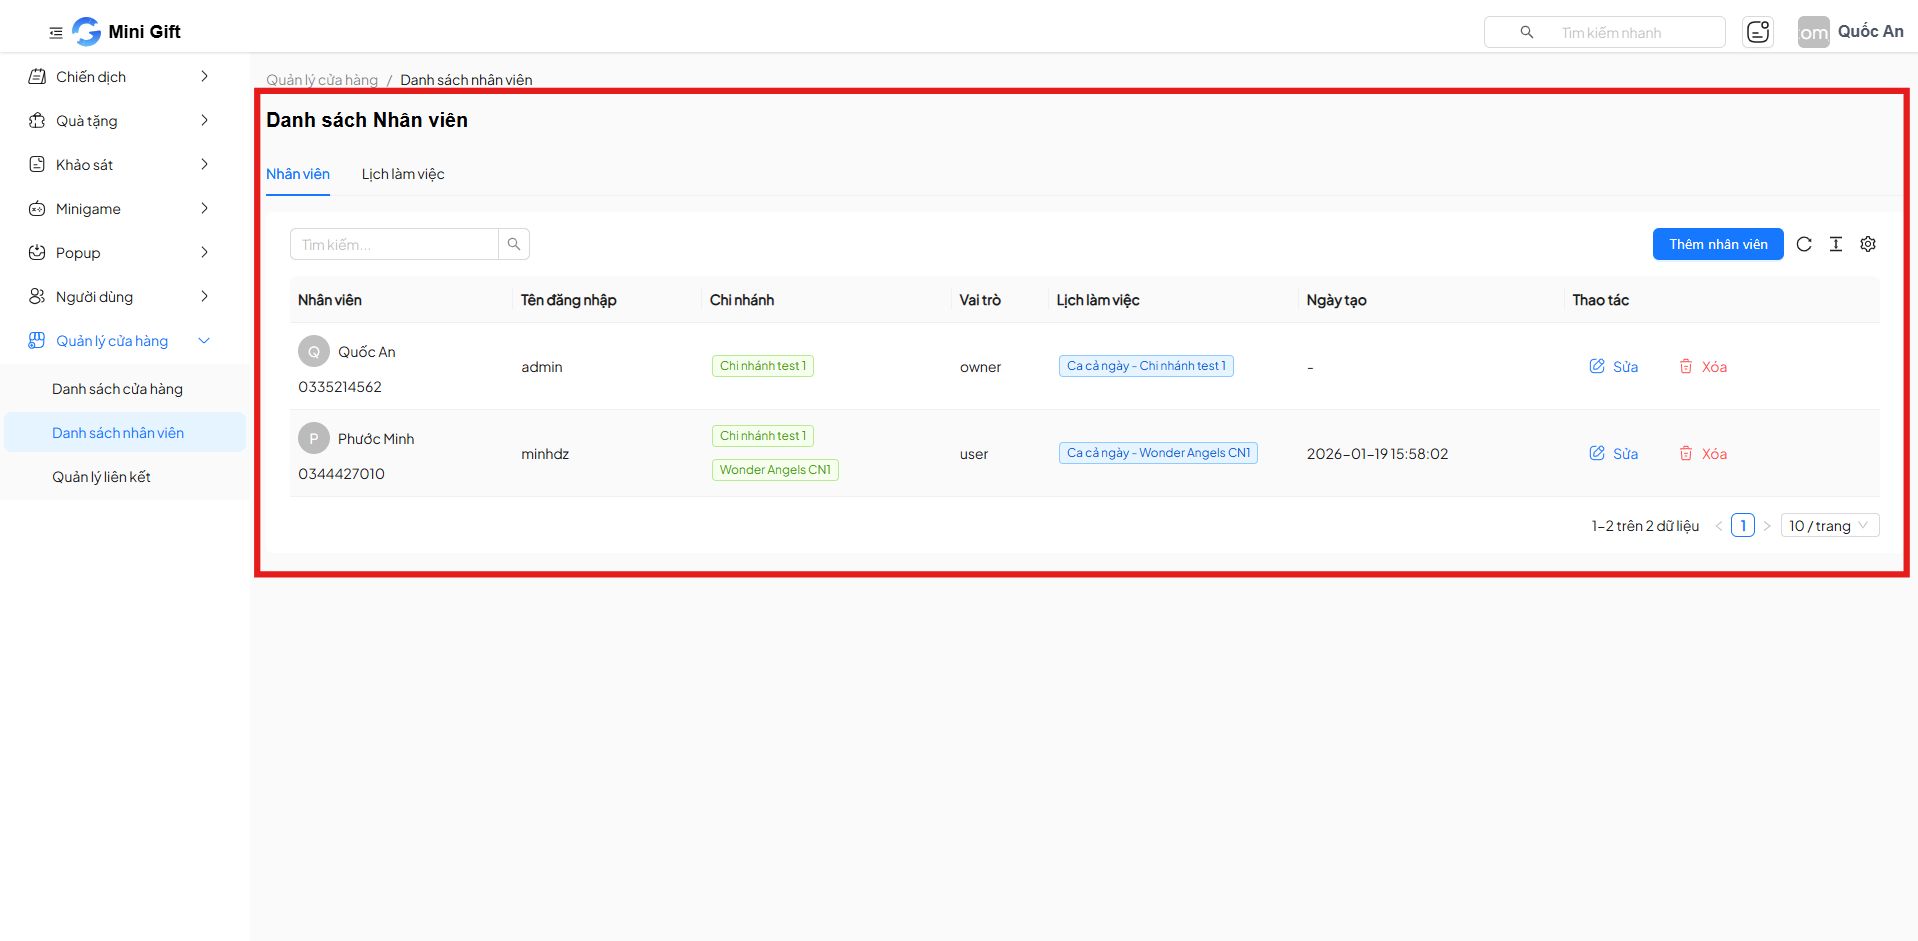
Each employee is displayed as a row of information with the following columns:
| Display Column | Description |
|---|---|
| Employee | Full name and phone number of the employee |
| Username | Account used to log in to the system |
| Branch | Branch where the employee currently works |
| Role | Employee's permissions in the system (Owner / User) |
| Work Schedule | Work schedule assigned to the employee |
| Created Date | Timestamp of employee account creation |
| Actions | Edit or delete the employee |
- Use the search bar to quickly locate an employee by name or phone number.
- The list can be sorted by columns for easier management.
3. Add New Employee
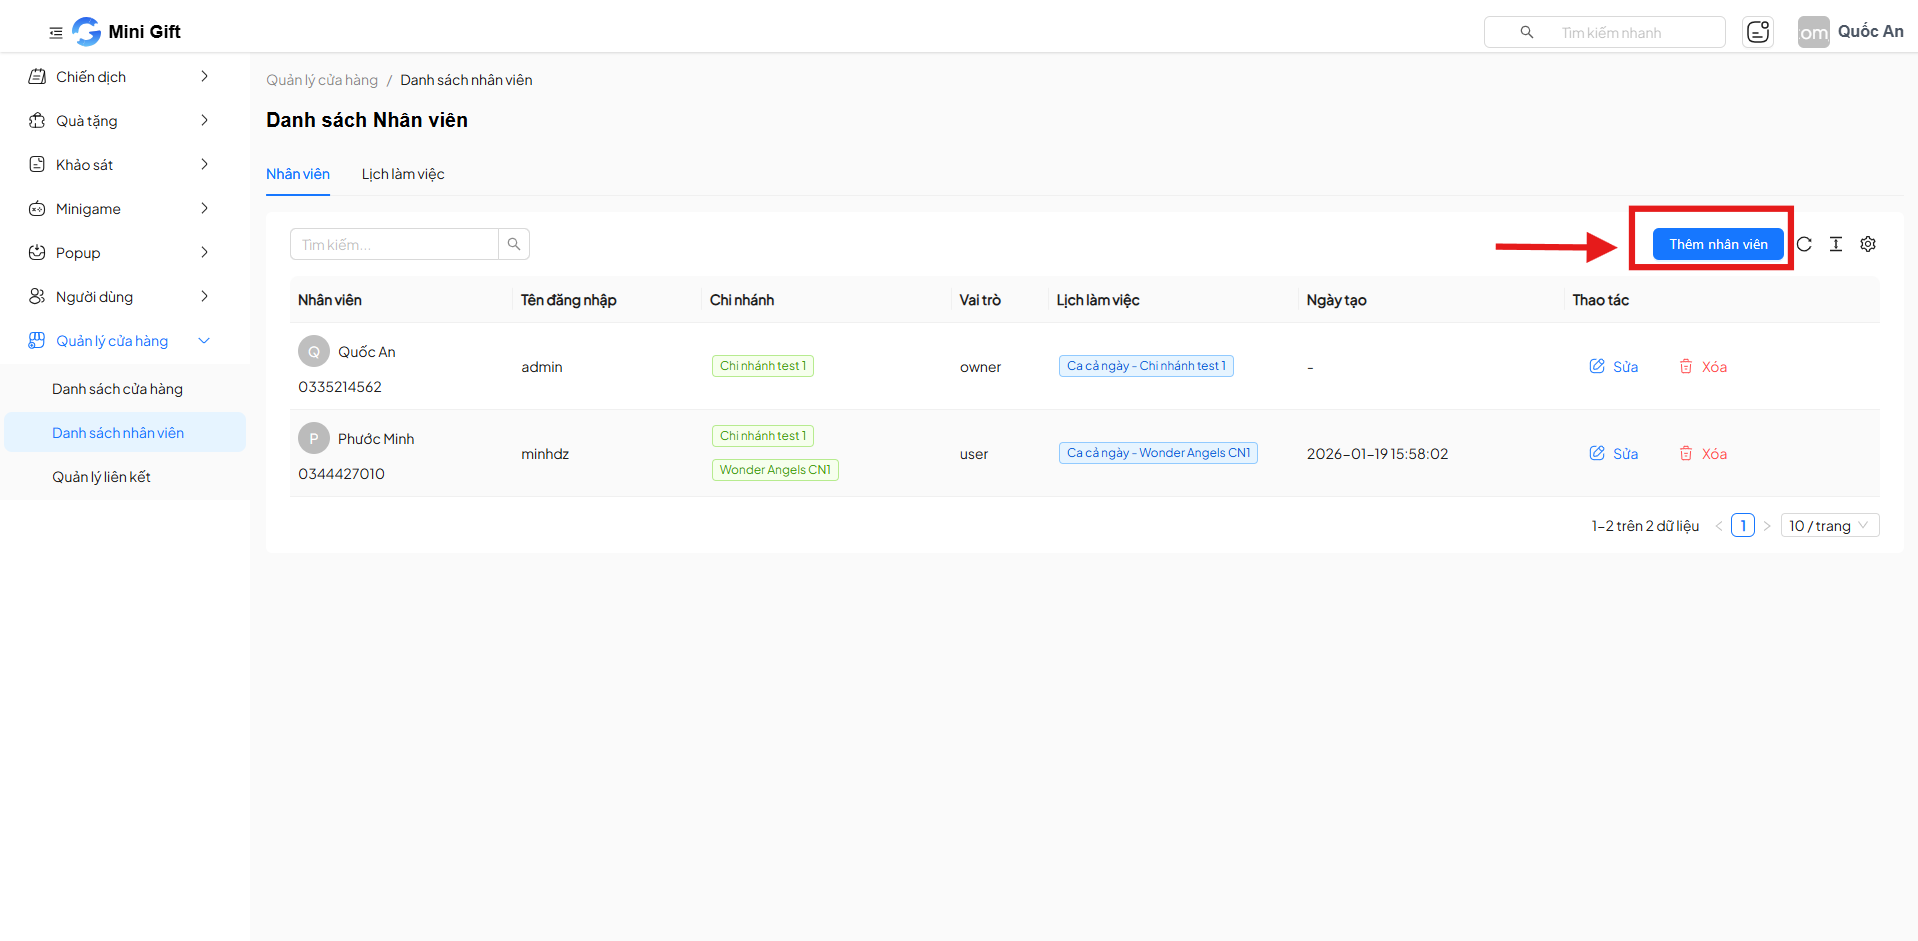
Step 1: Open the Add Employee Form
- Click the Add Employee button in the upper right corner of the screen.
Step 2: Enter Employee Information
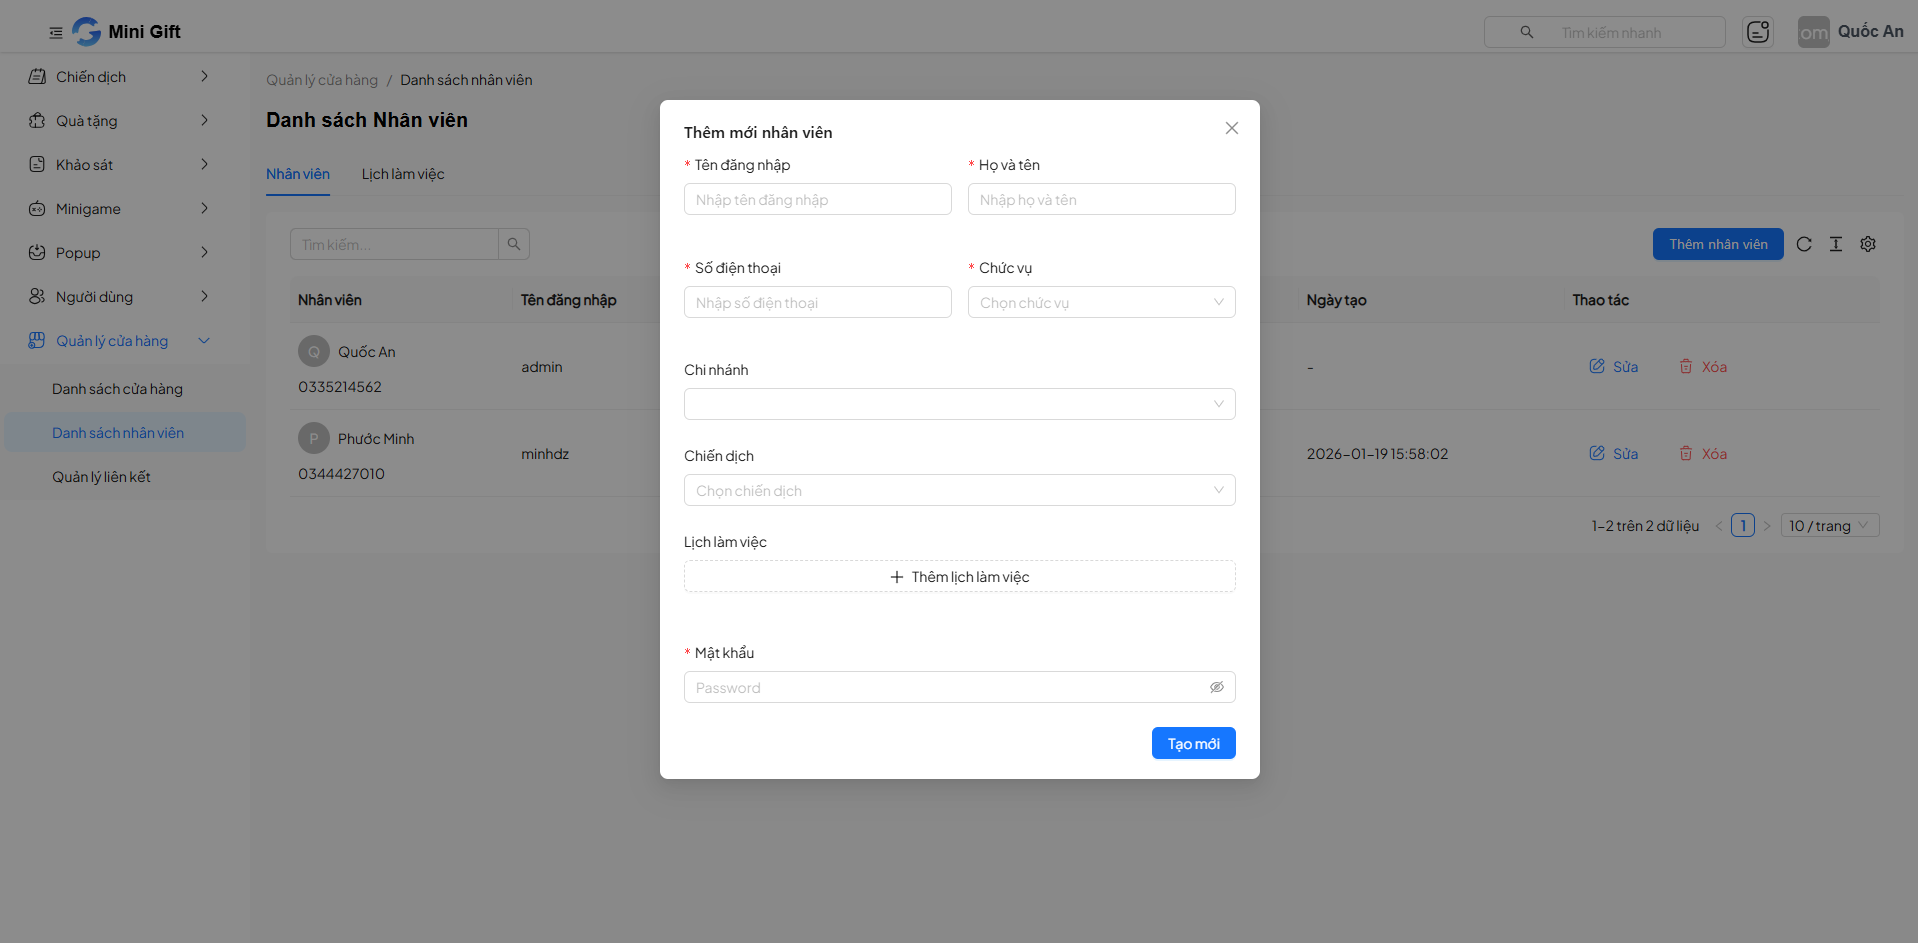
The information fields include:
| Field | Description | Required |
|---|---|---|
| Username | Account used to log in to the system | Yes |
| Full Name | Employee's full name | Yes |
| Phone Number | Employee's contact phone number | Yes |
| Position / Role | Employee's permissions in the system | Yes |
| Branch | Employee's working branch | No |
| Campaign | Campaign assigned to the employee (if any) | No |
| Work Schedule | Work schedule assigned to the employee | No |
| Password | Login password for the employee | Yes |
Step 3: Complete
- Click Create to save the employee to the system.
- Each username is unique in the system.
- The role directly affects the employee's operational permissions.
4. Edit and Delete Employee
In the Actions column of each employee:
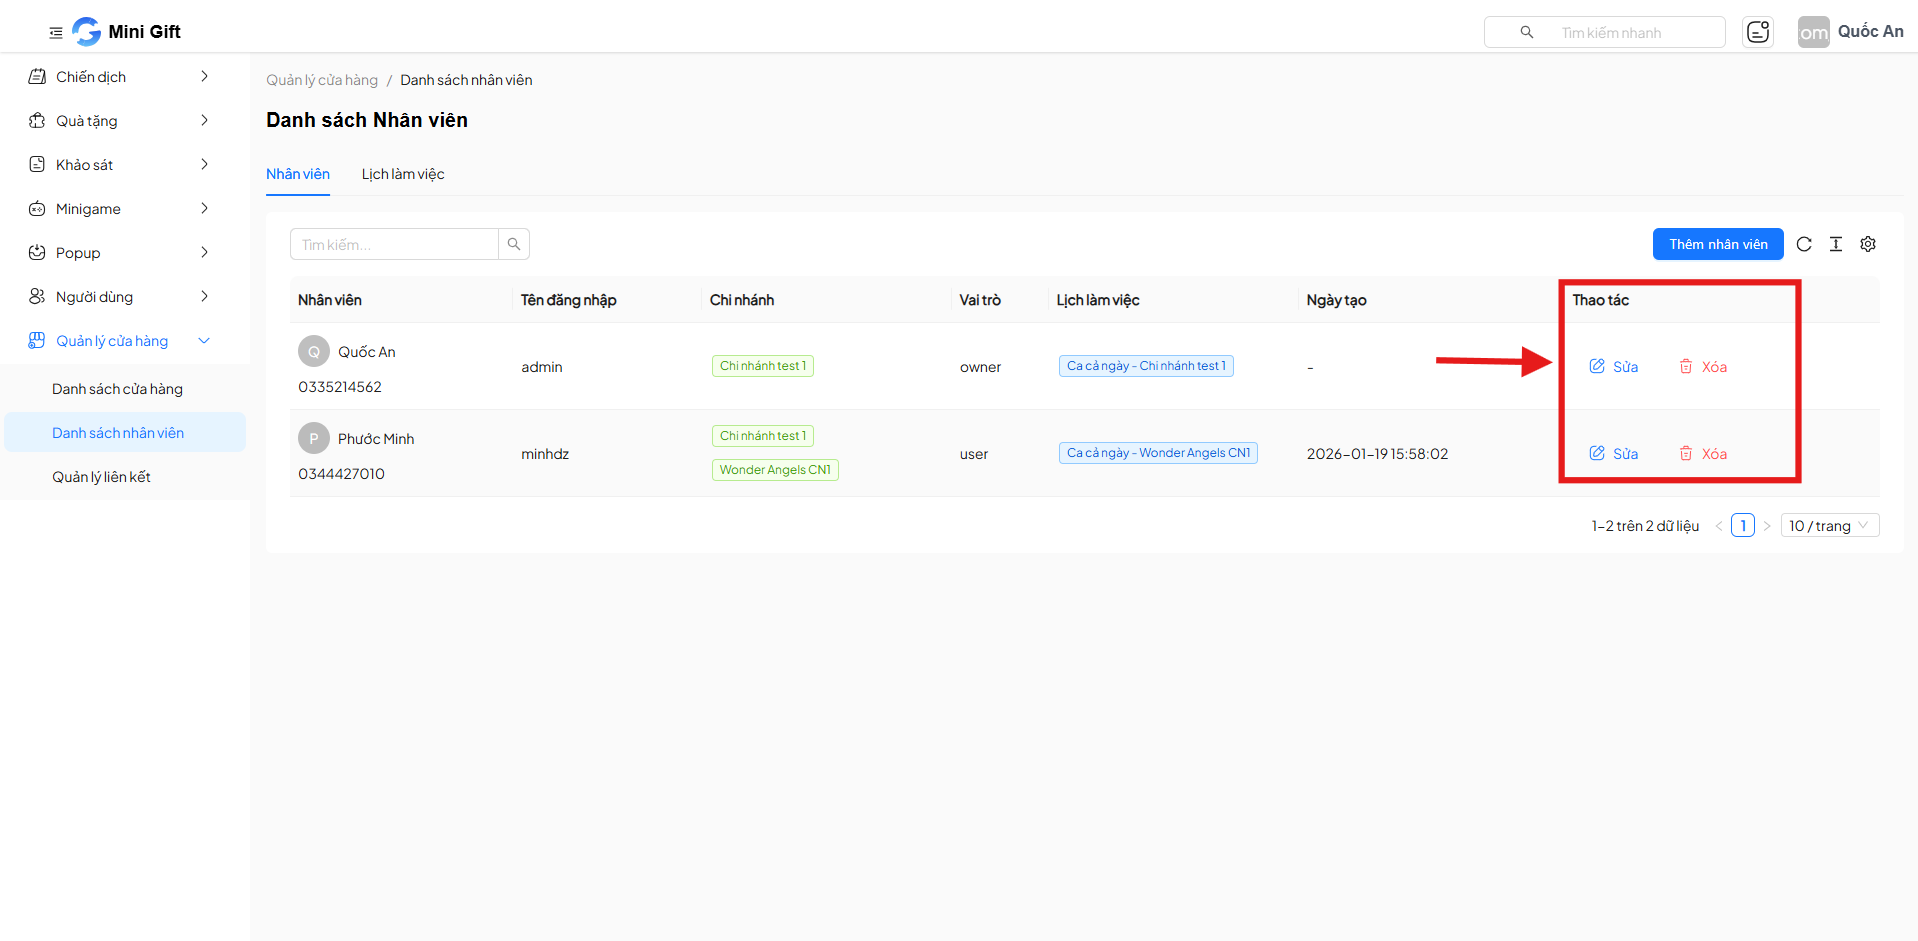
4.1. Edit
- Click Edit to update employee information:
- Branch
- Role
- Work schedule
- Personal information
4.2. Delete
- Click Delete to remove the employee from the system.
- The system will request confirmation before deletion.
- Deleting an employee will revoke that account's access to the system.
- This action cannot be undone. Make sure before proceeding.
5. Work Schedule Management
Switch to the Work Schedule tab on the Employee List screen.
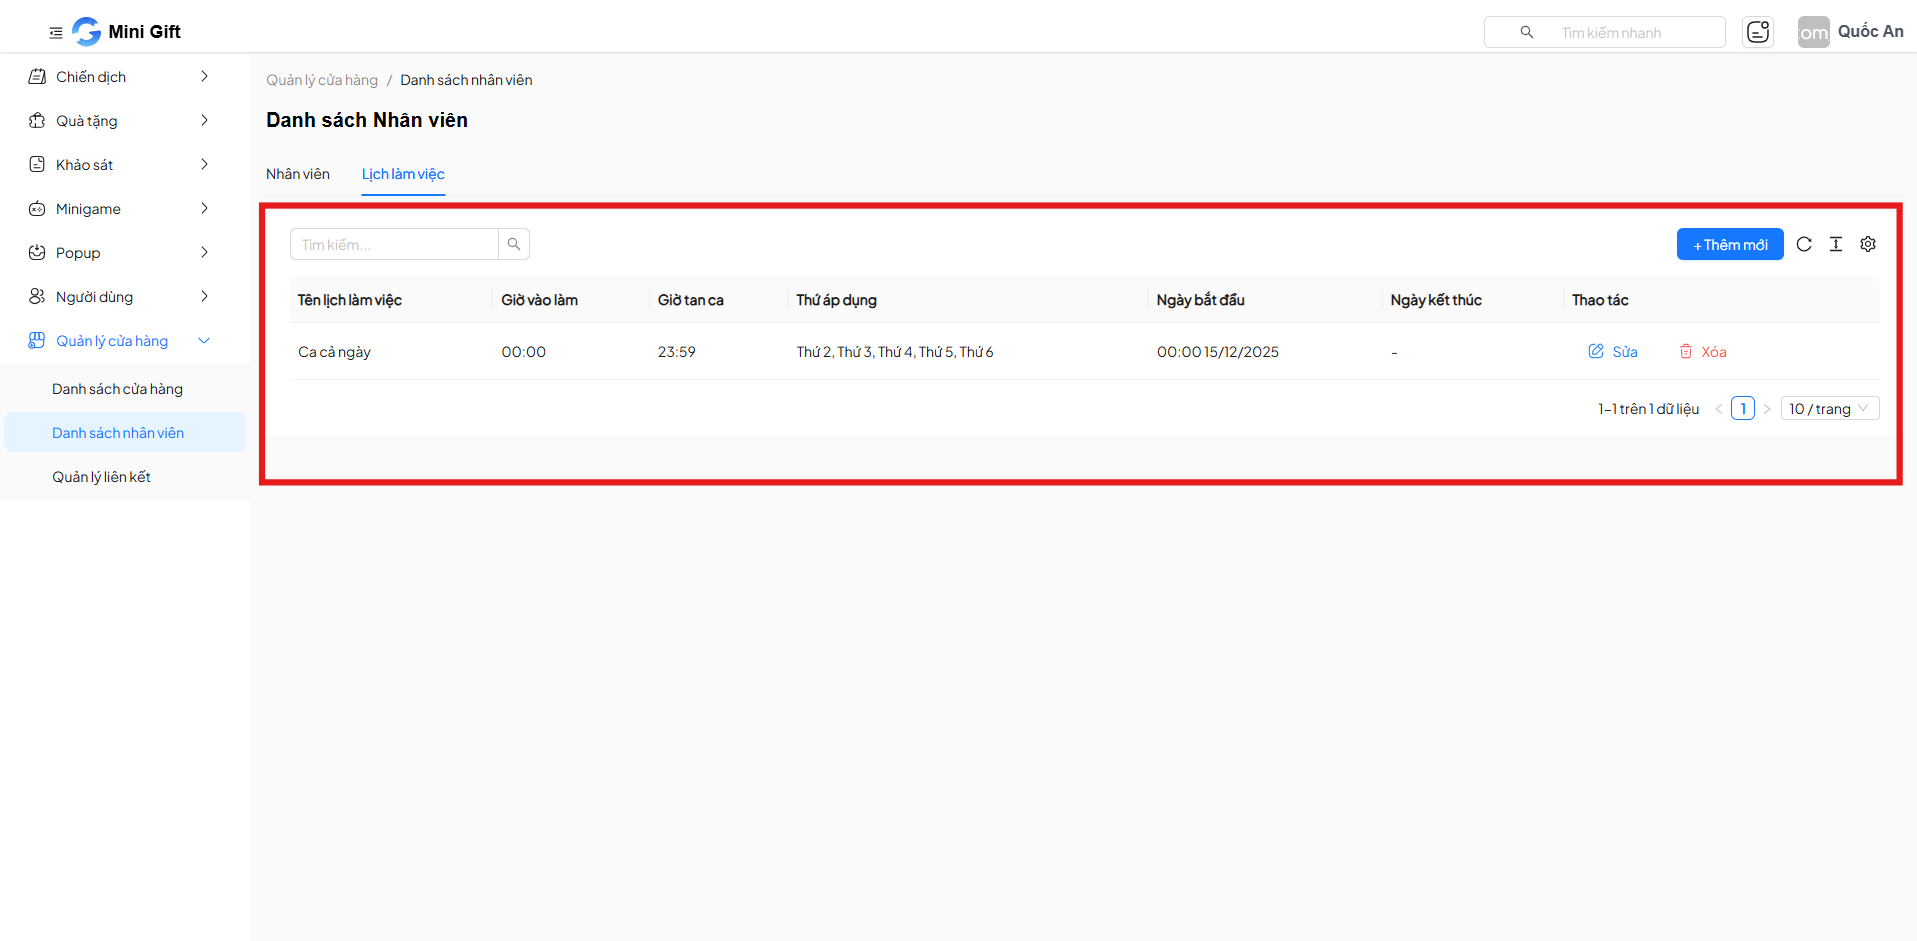
The work schedule list includes:
| Display Column | Description | Example |
|---|---|---|
| Schedule Name | Name used to identify the work schedule | Full Day Shift |
| Clock In Time | Shift start time | 08:00 |
| Clock Out Time | Shift end time | 17:30 |
| Applied Days | Days of the week the schedule applies | Monday – Friday |
| Start Date | Effective start date of the work schedule | 15/12/2025 |
| End Date | Effective end date of the work schedule (can be left blank if unlimited) | – |
| Actions | Edit or delete the work schedule | Edit / Delete |
7. Add New Work Schedule
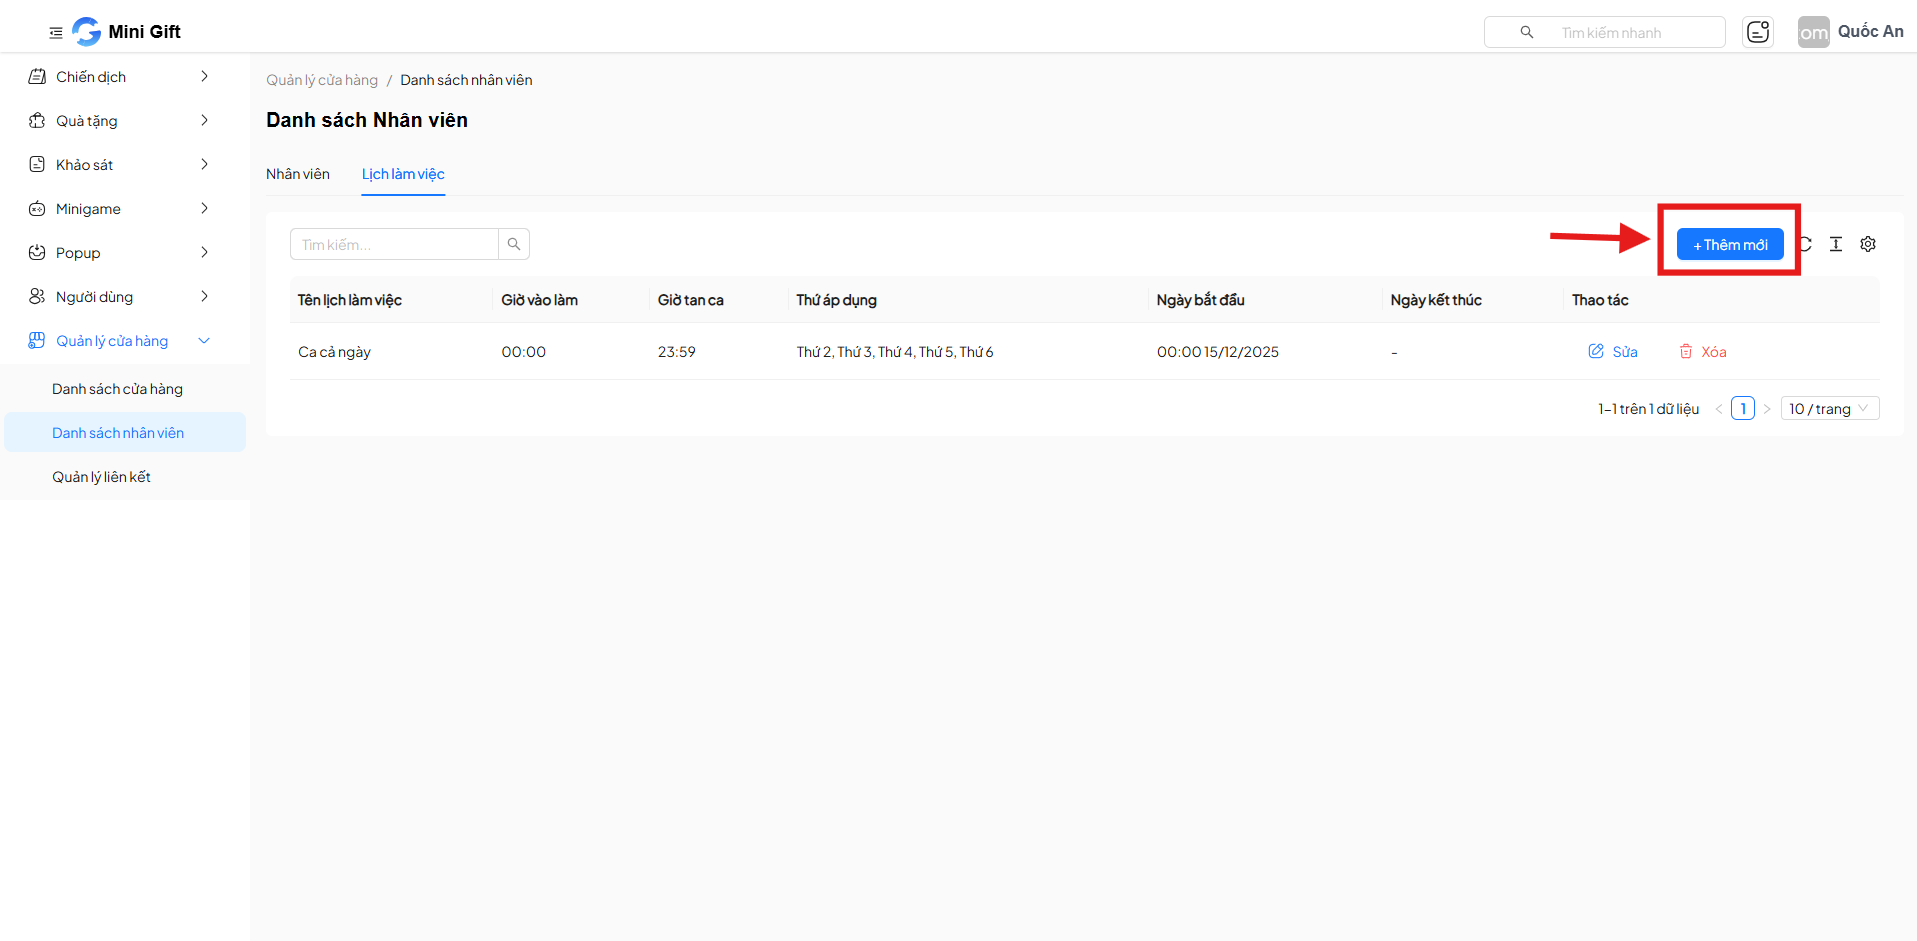
Step 1: Click Add New Button
- Select + Add New in the Work Schedule tab.
Step 2: Set Up Work Schedule
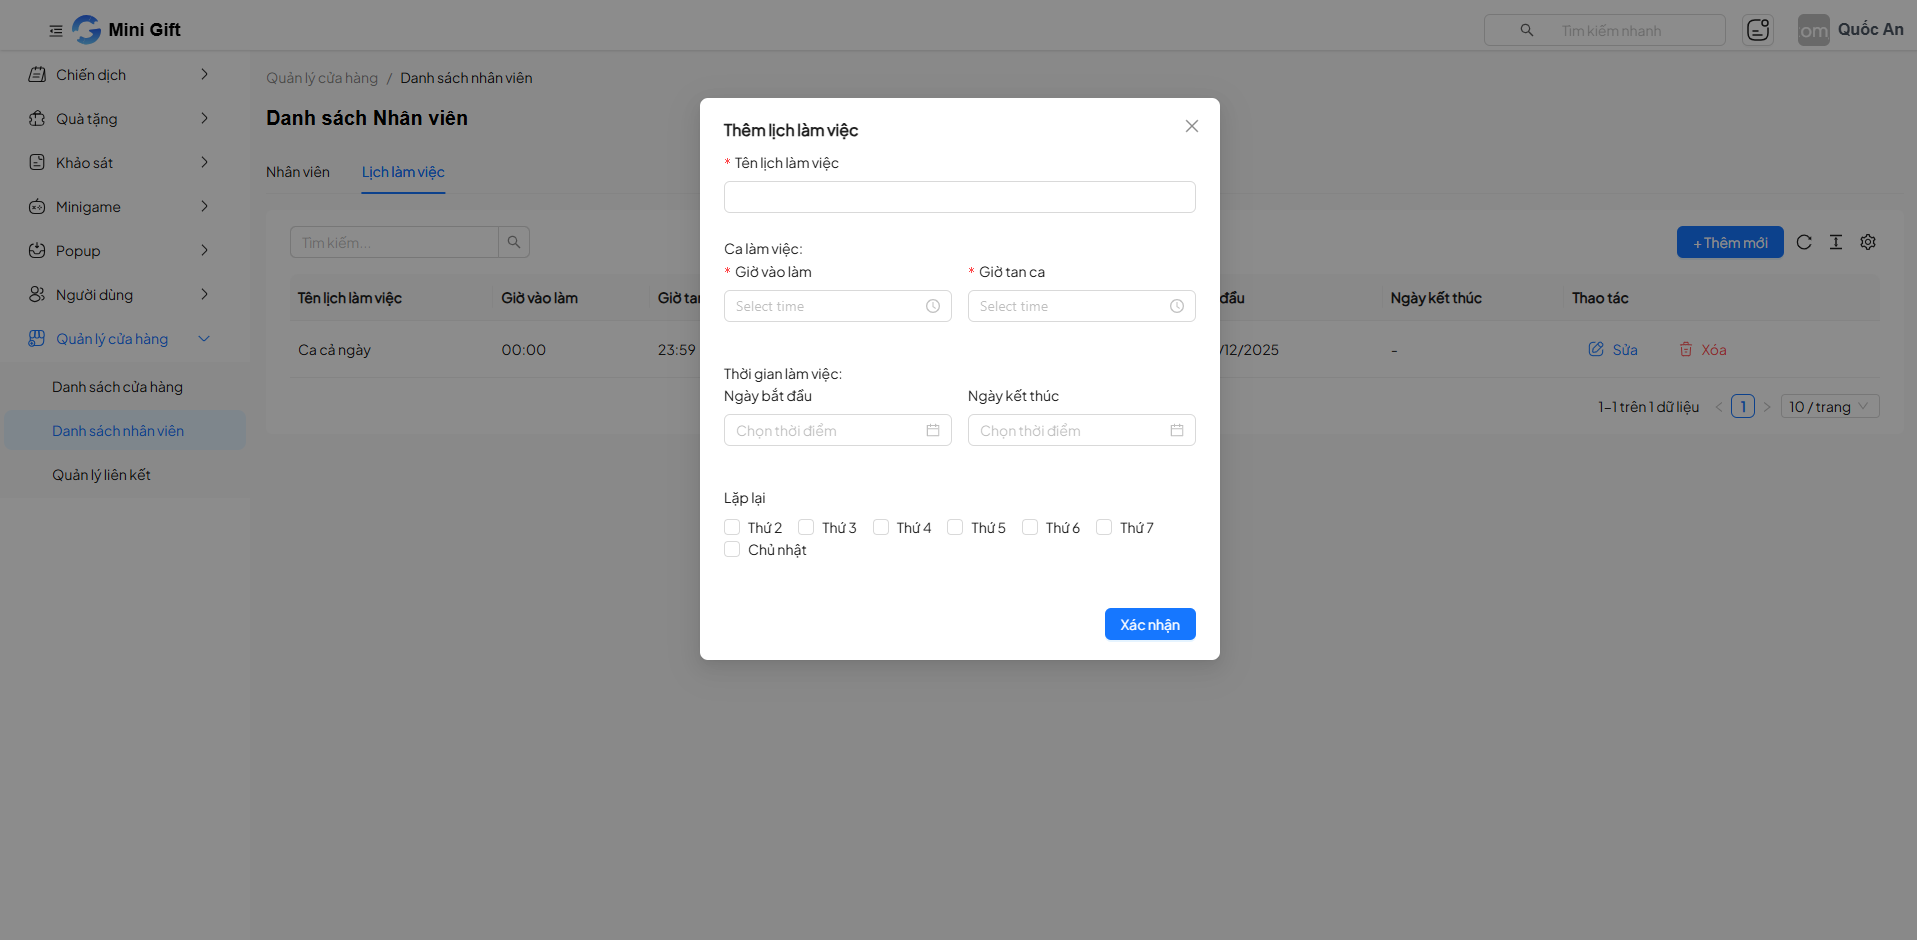
Information to enter:
| Field | Description | Required | Example |
|---|---|---|---|
| Schedule Name | Name used to identify the work schedule | Yes | Morning Shift |
| Clock In Time | Shift start time | Yes | 08:00 |
| Clock Out Time | Shift end time | Yes | 17:00 |
| Start Date | Effective start date of the work schedule | No | 01/01/2026 |
| End Date | Effective end date (can be left blank if unlimited) | No | 31/12/2026 |
| Repeat | Days of the week the schedule applies | No | Monday – Sunday |
Step 3: Confirm
- Click Confirm to save the work schedule.
8. Work Schedule Actions
In the Actions column of each work schedule:
- Edit: Update working hours, applied days, or repeat days
- Delete: Remove the work schedule from the system
A work schedule can be assigned to multiple employees.
9. Notes
- Create work schedules first, then assign them to employees for faster operations.
- The Owner role should be limited to senior management.
- Carefully check the branch and work schedule when adding new employees to avoid operational discrepancies.
10. Summary
The Employee List feature helps you:
- Manage all personnel centrally
- Assign clear permissions by role
- Flexibly assign branches and work schedules
- Optimize operations for stores and branch chains