Webhook Configuration - Step-by-Step Setup Guide
This page walks you through setting up a webhook for your store, from entering the receiving URL to testing events and activation.
Overview
Configuring a webhook involves 5 main steps:
- Open the Webhook tab on the API Key settings page
- Enter the webhook URL and check the connection
- Choose an authentication method
- Select the events to subscribe to
- Test each event, Activate and Save
- The URL must use HTTPS.
- The URL must be publicly reachable on the Internet — internal addresses such as
localhost, private IPs (10.x, 192.168.x...) and cloud metadata addresses are rejected. - The receiving server must respond with a 2xx code within 10 seconds; slower responses or error codes count as failed deliveries.
Step-by-step guide
Step 1: Open the Webhook tab
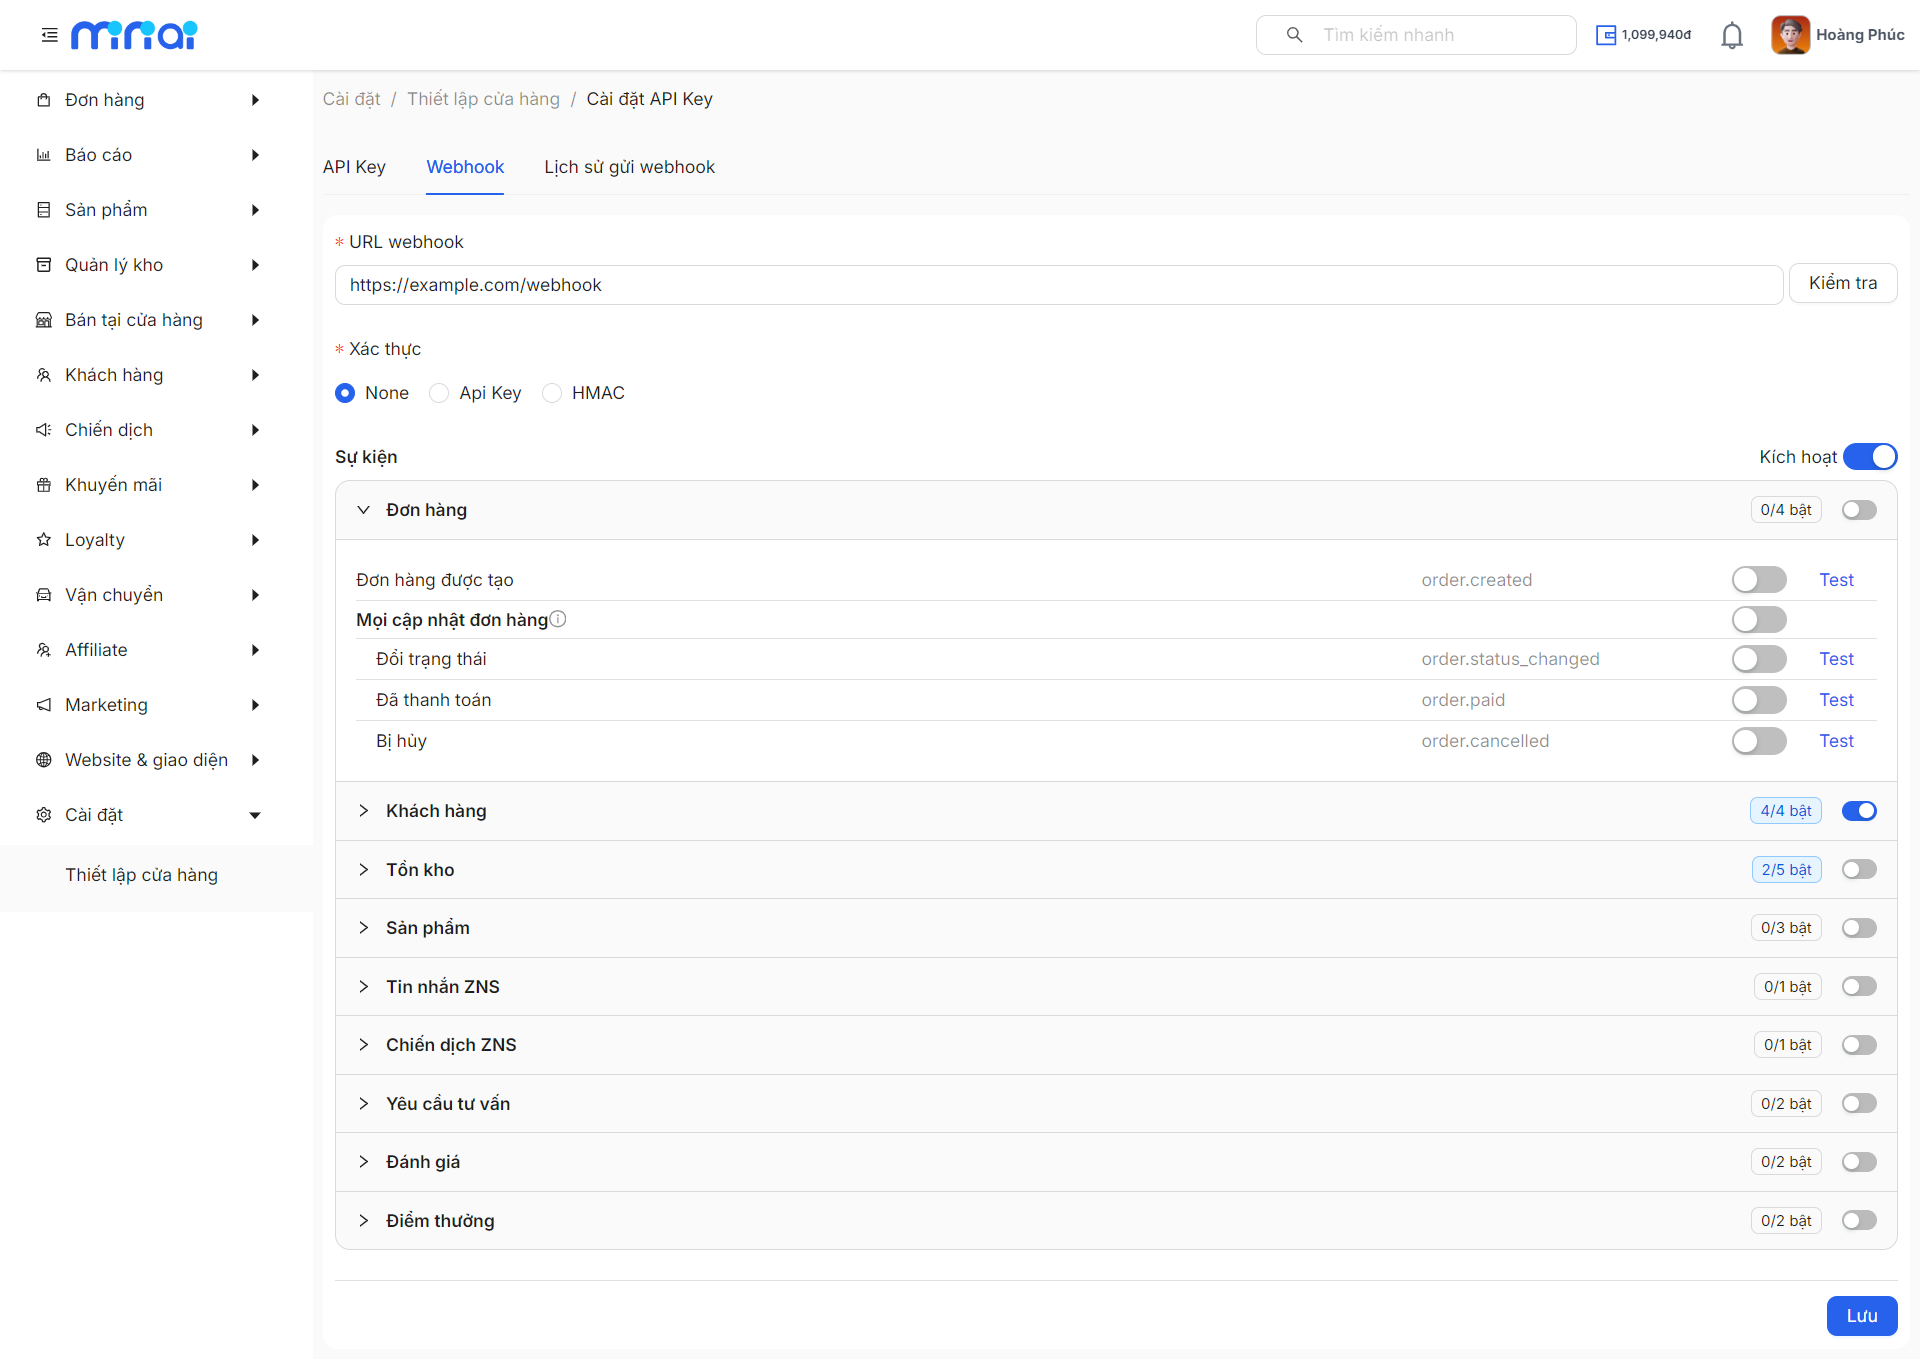
On the Admin Portal, go to Settings → Store Settings → API Key, then select the Webhook tab.
If the store hasn't created an API Key yet, this tab only shows a message asking you to create one on the API Key tab first. If an API Key already exists, the webhook configuration form is shown right away (empty if no webhook has been saved yet).
Step 2: Enter the webhook URL and check the connection
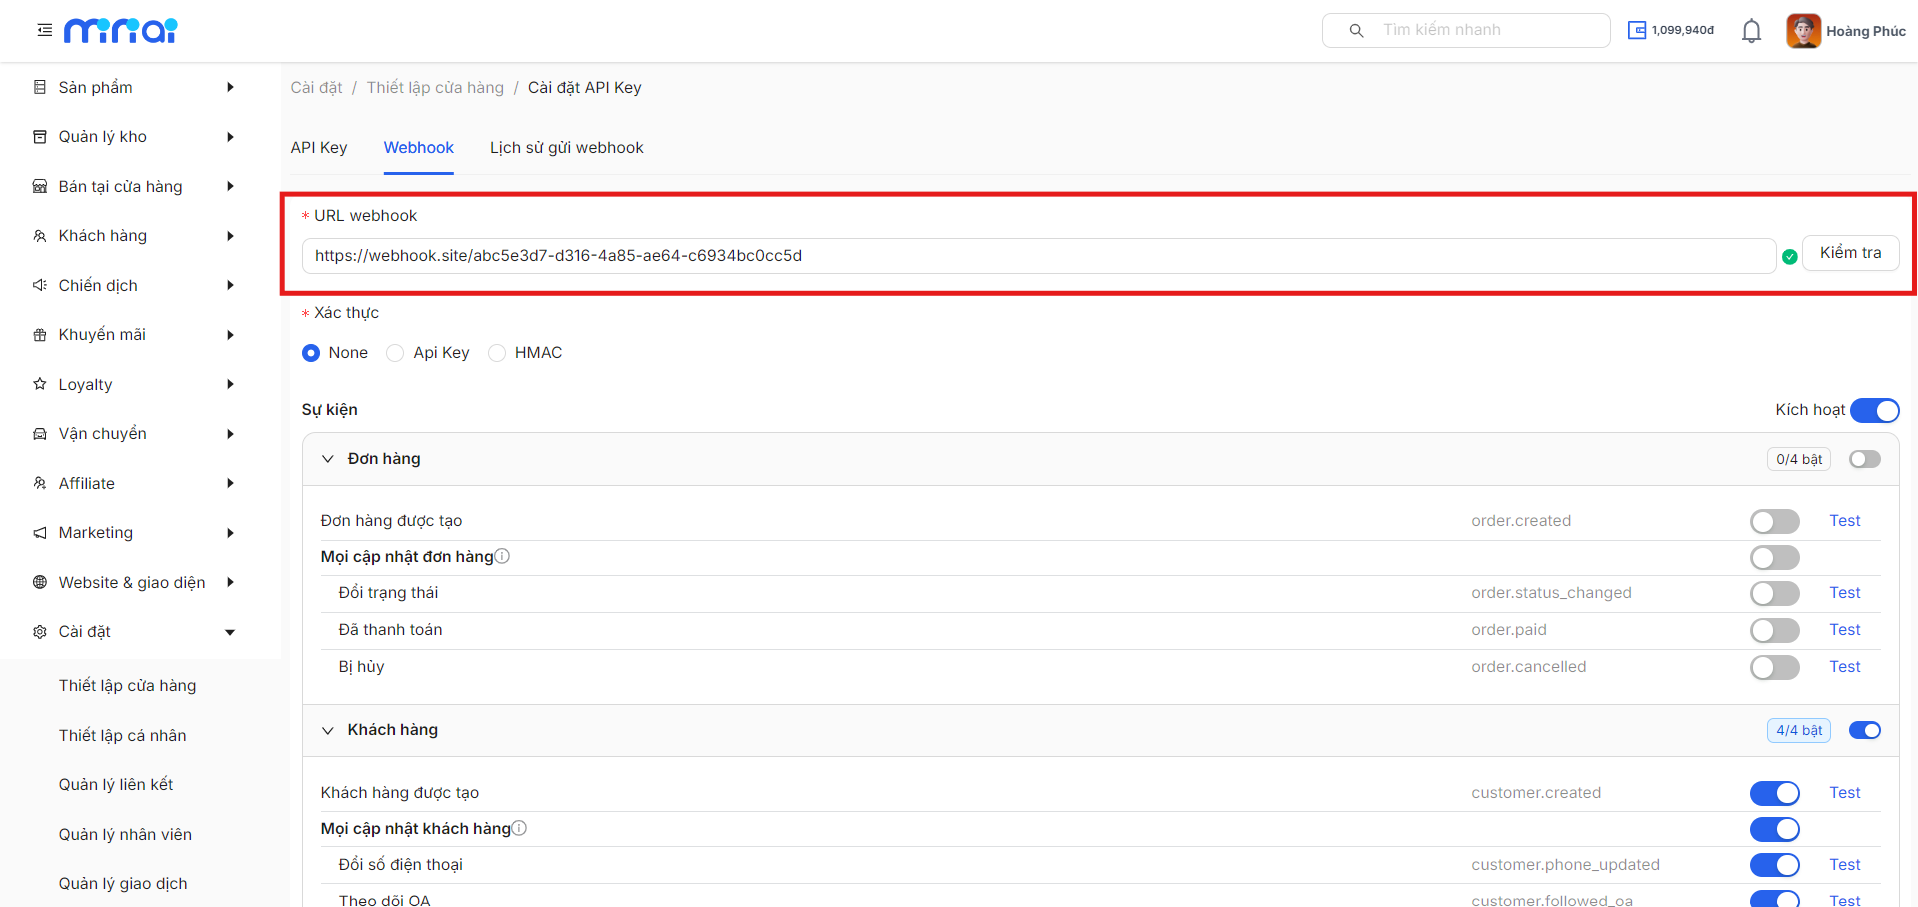
Enter the address of the server that will receive event data into the URL field, e.g. https://api.partner.com/webhooks/miniai.
Click the Check button next to it so the system pings the URL. A successful result means the URL is reachable (even if the server returns a 4xx code — any response counts).
Step 3: Choose an authentication method
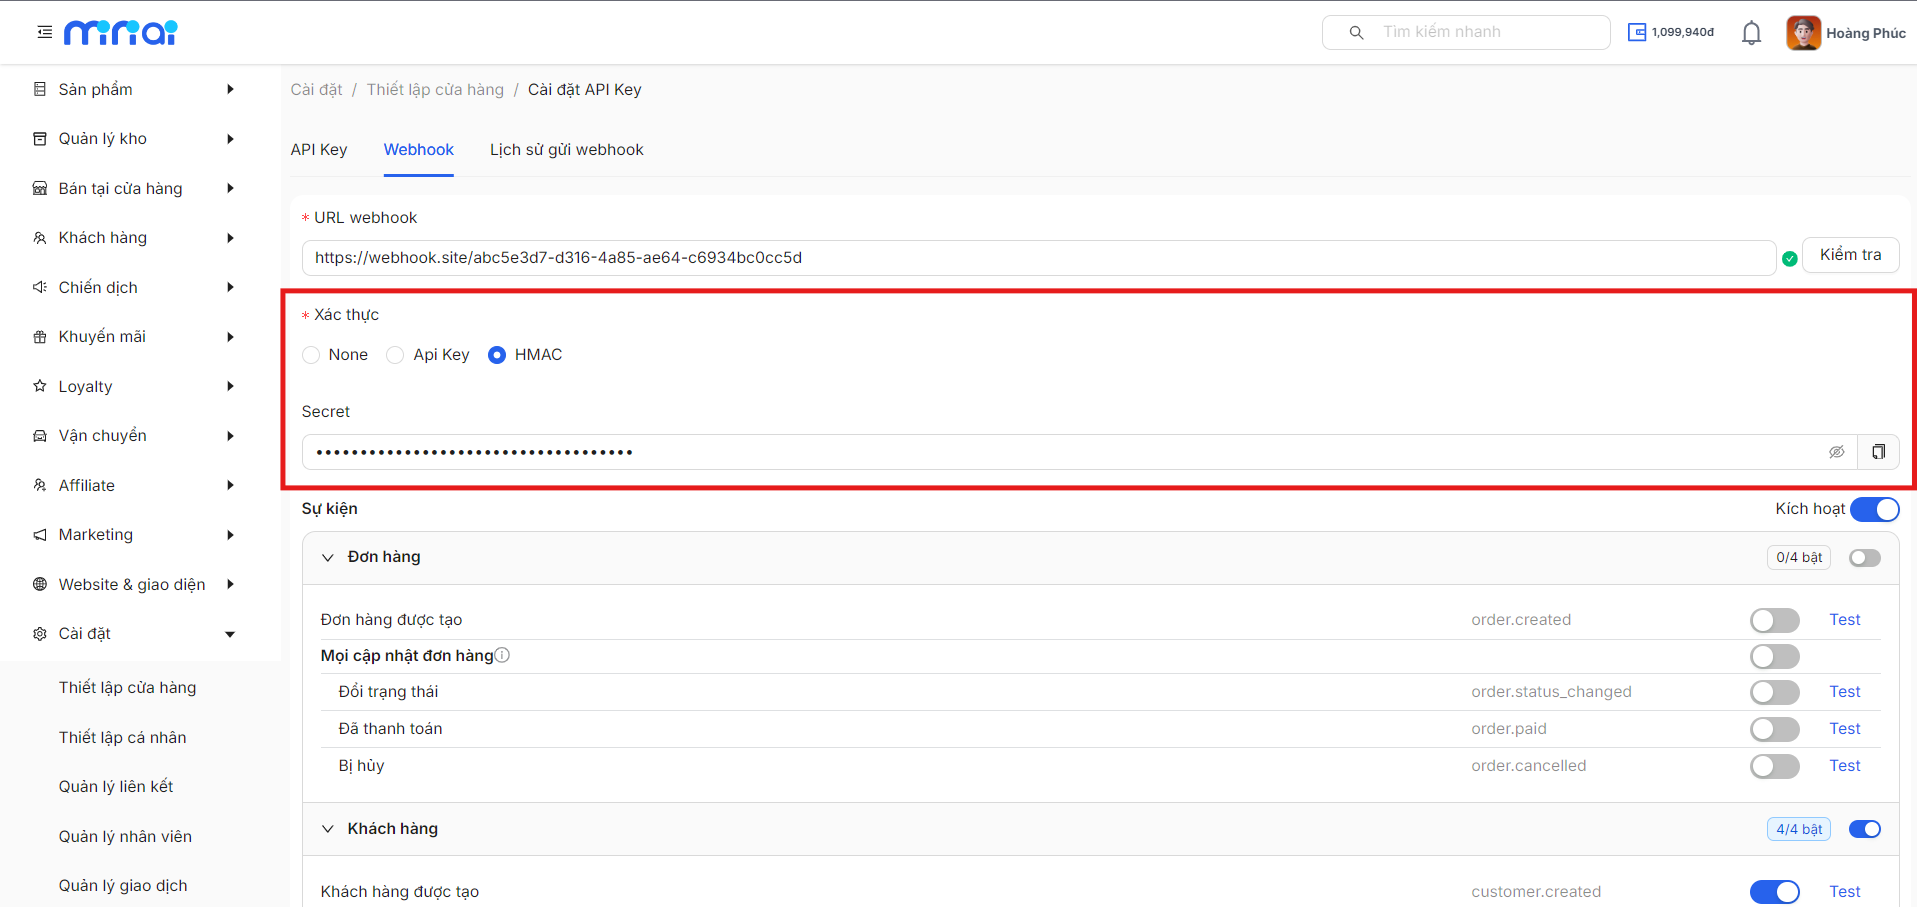
The system supports 3 methods for the receiving server to verify that a webhook really comes from MiniAI:
- None — no authentication information attached. Only recommended for testing.
- Api Key — declare your own header key–value pairs (e.g.
X-Api-Key: abc123). The system attaches these headers to every webhook request. At least 1 header is required. - HMAC — the system signs each request body with HMAC-SHA256 using the Secret and sends the signature in the
X-Webhook-Signatureheader. If left blank, the Secret is generated automatically on save. This is the most secure and recommended method.
Step 4: Select the events to subscribe to
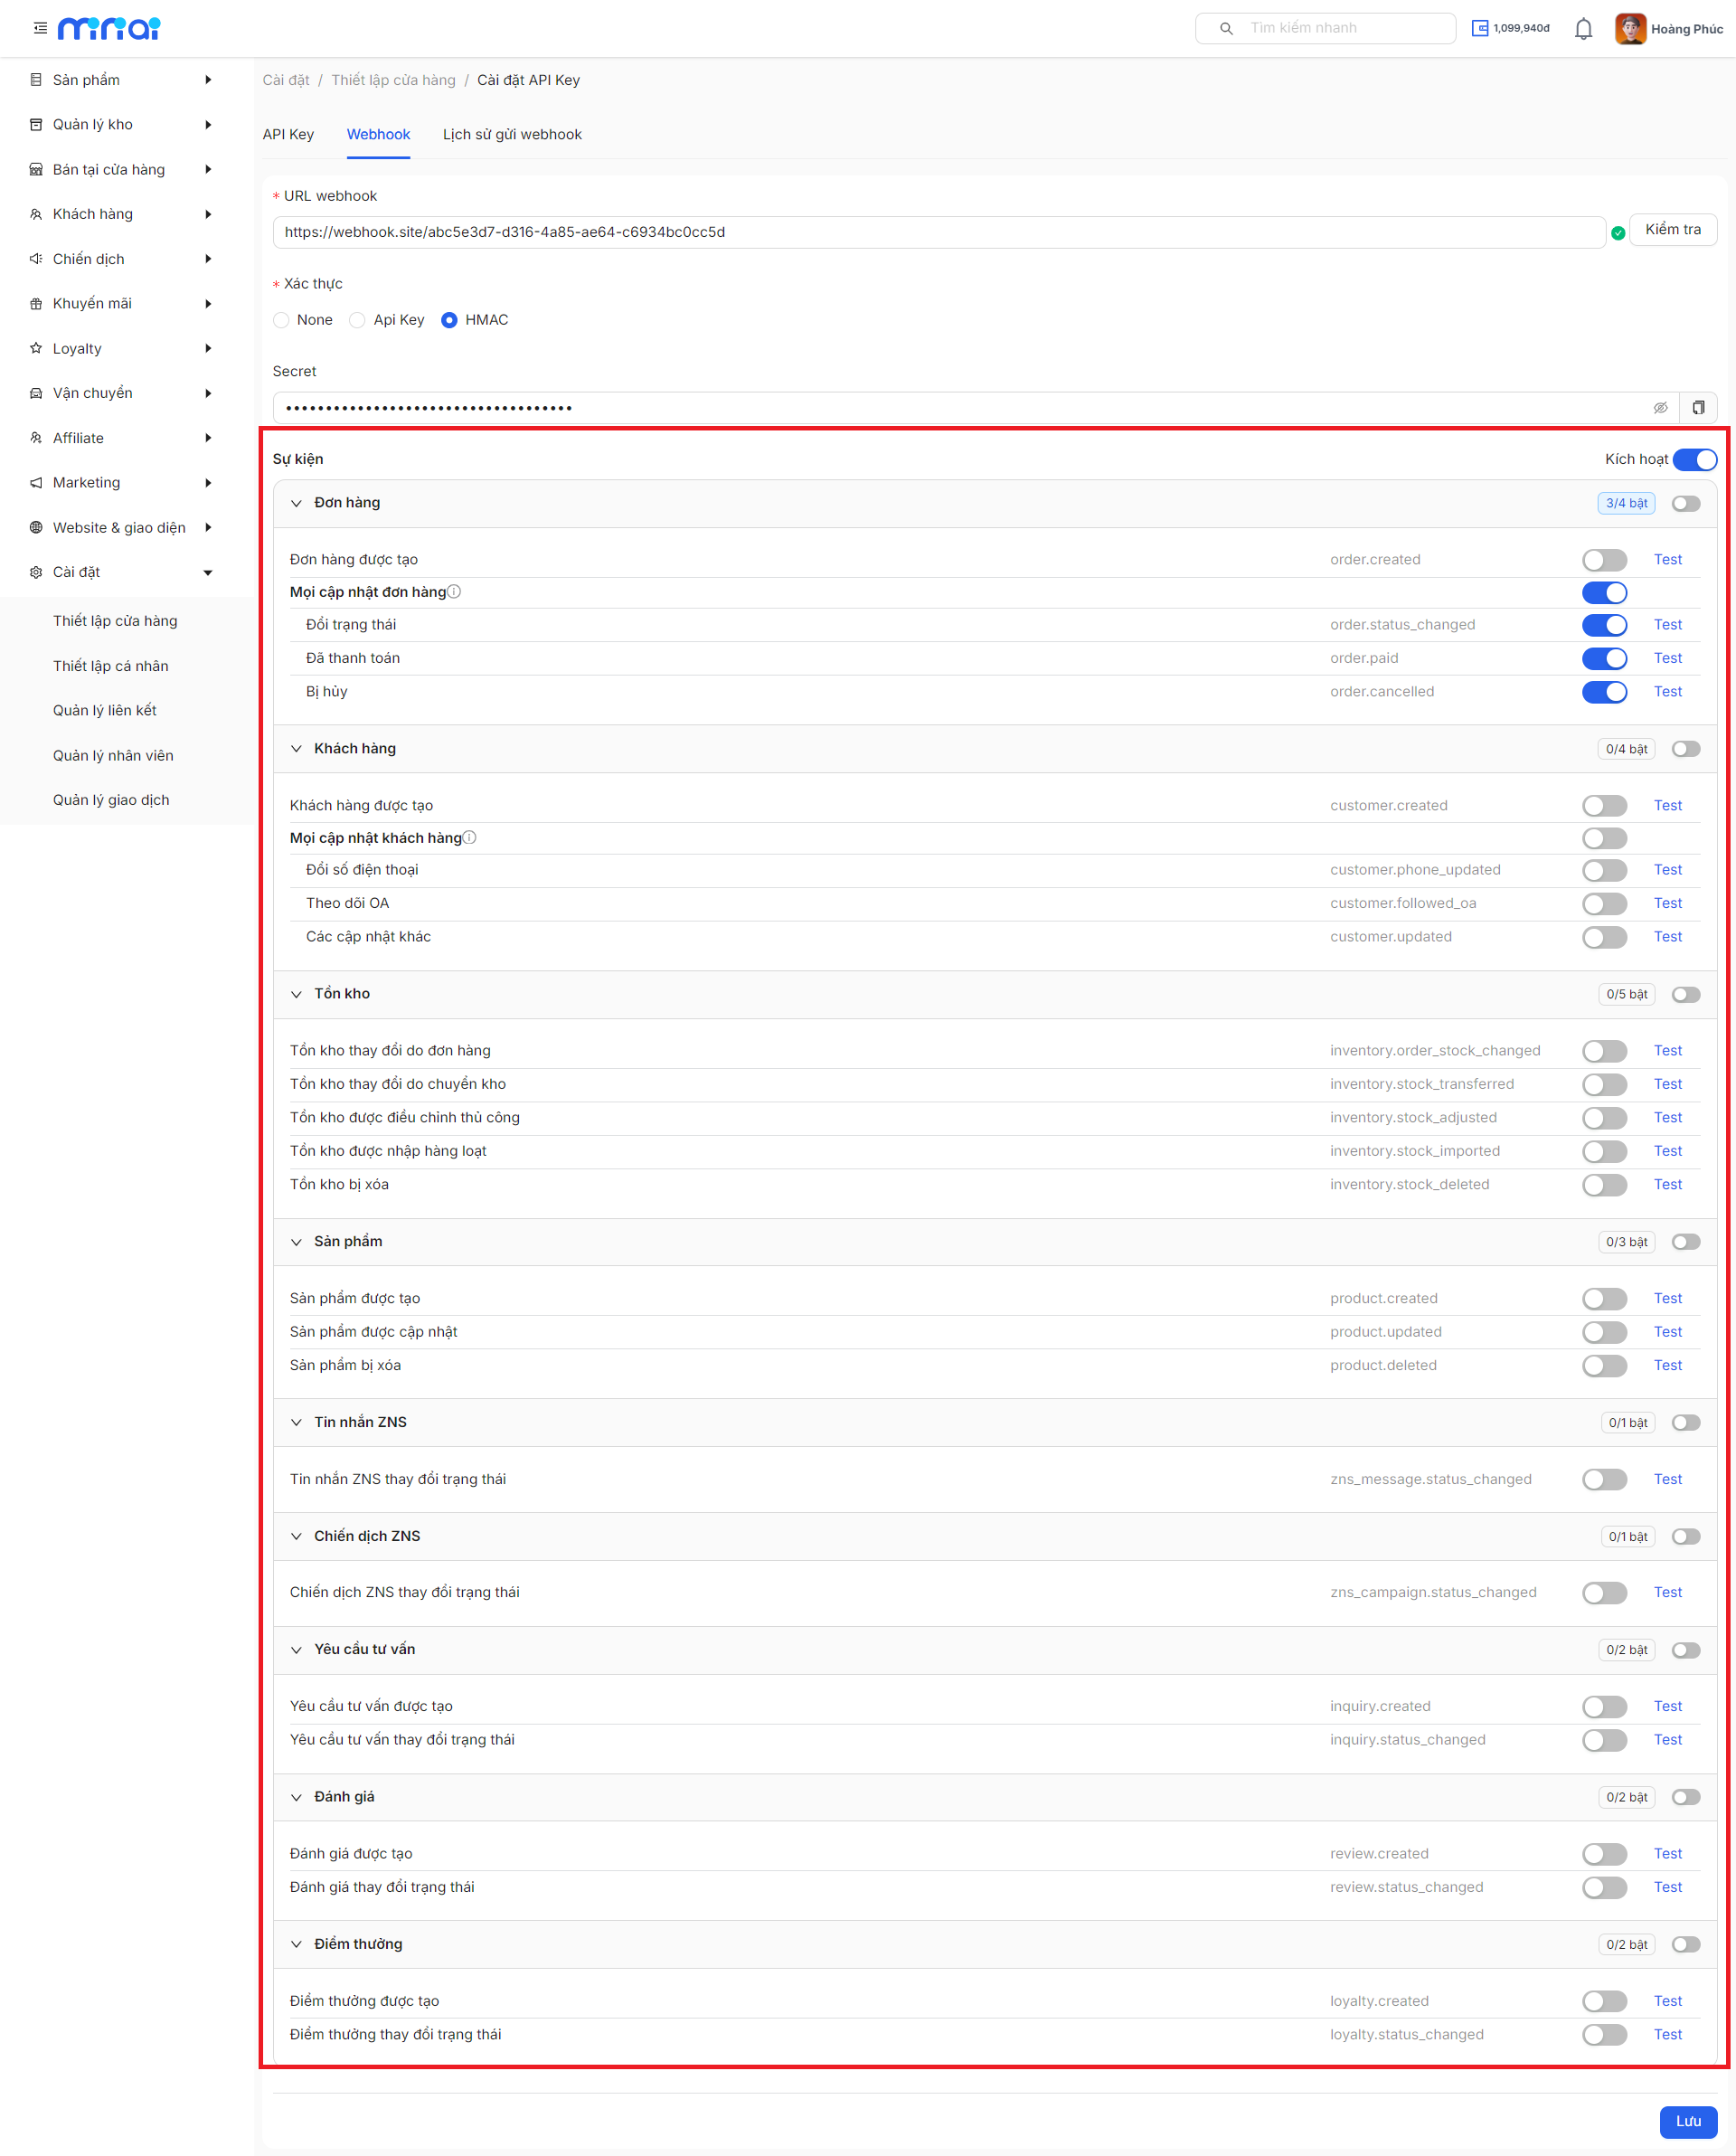
In the Events section, tick the events you want to be notified about. Events are grouped by domain (Orders, Customers, Inventory, Products...).
The Orders and Customers groups offer a combined option — "All order updates" / "All customer updates" — ticking it is equivalent to selecting every update event in that group.
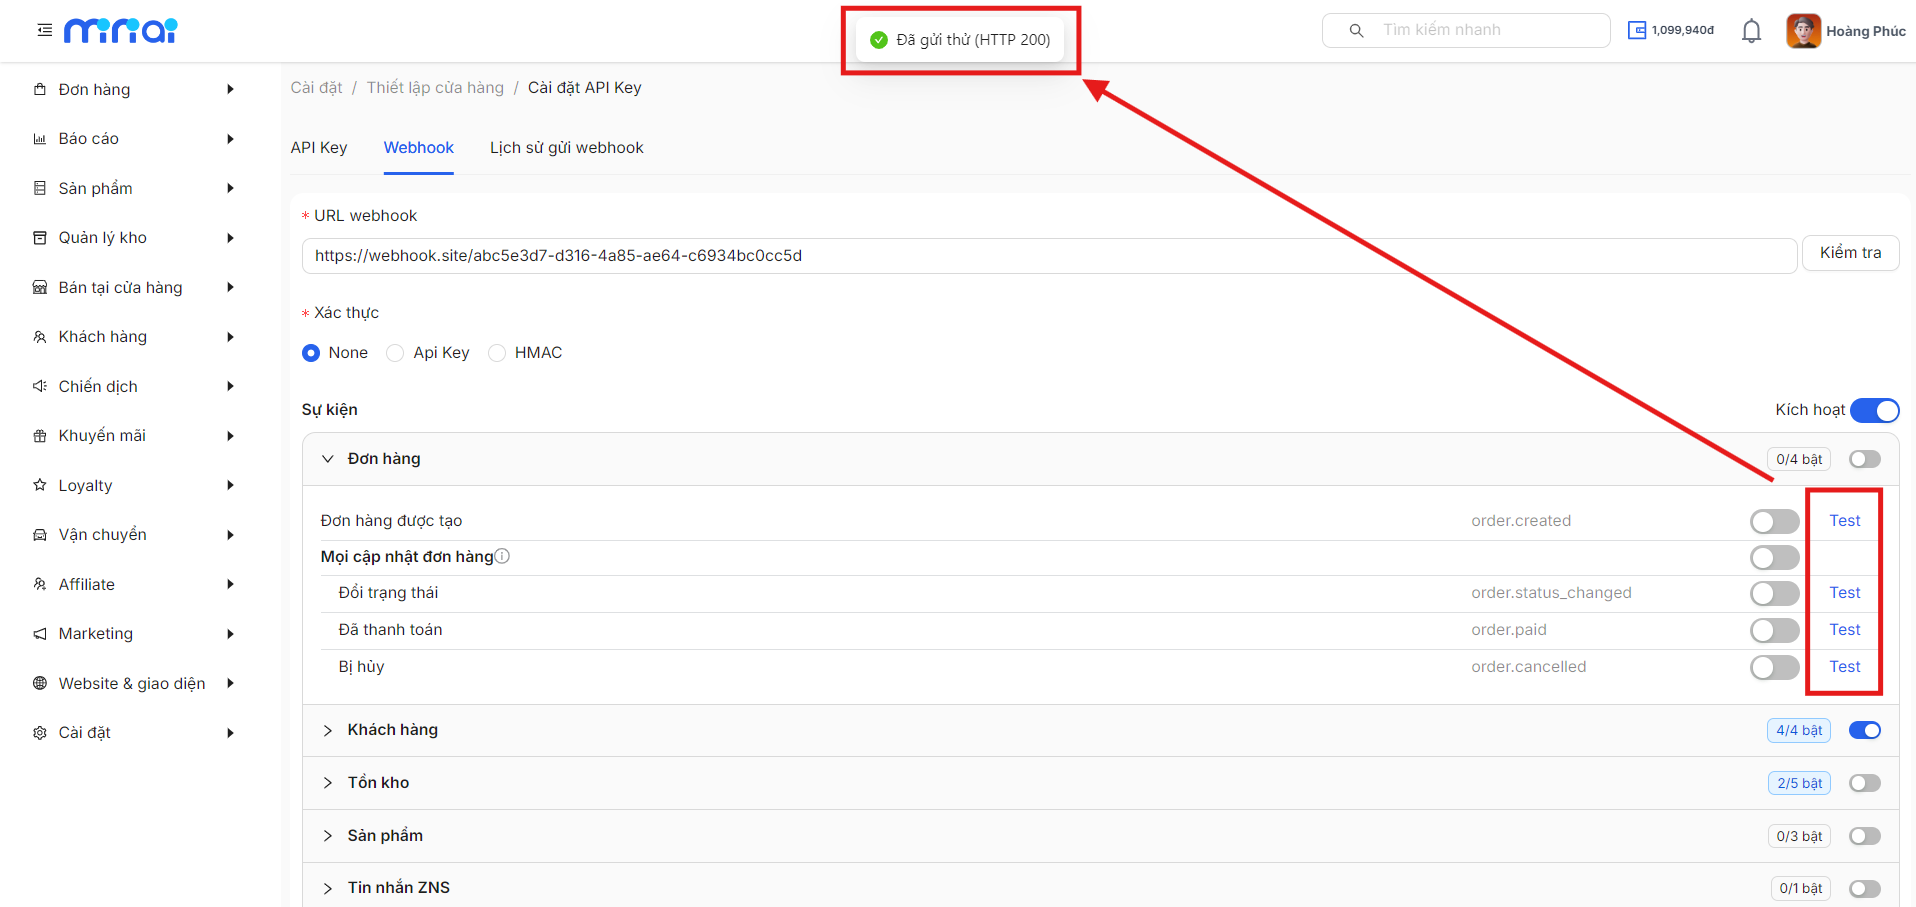
Each event row has its own Test button on the right — use it to send a sample payload for that specific event (see Step 5).
At least 1 event must be selected to save the configuration. For the full list of 24 events, see Events & Payload.
Step 5: Test each event, activate and save
- Click the Test button on an event row from Step 4 to immediately send a sample payload for that specific event to the URL you entered, using the authentication method currently configured — no need to save the form first, but a valid URL is required (an empty URL shows "Please enter the webhook URL before testing"). The result appears as a toast notification: "Test sent (HTTP ...)" if the URL was reached, or an error message if it could not connect.
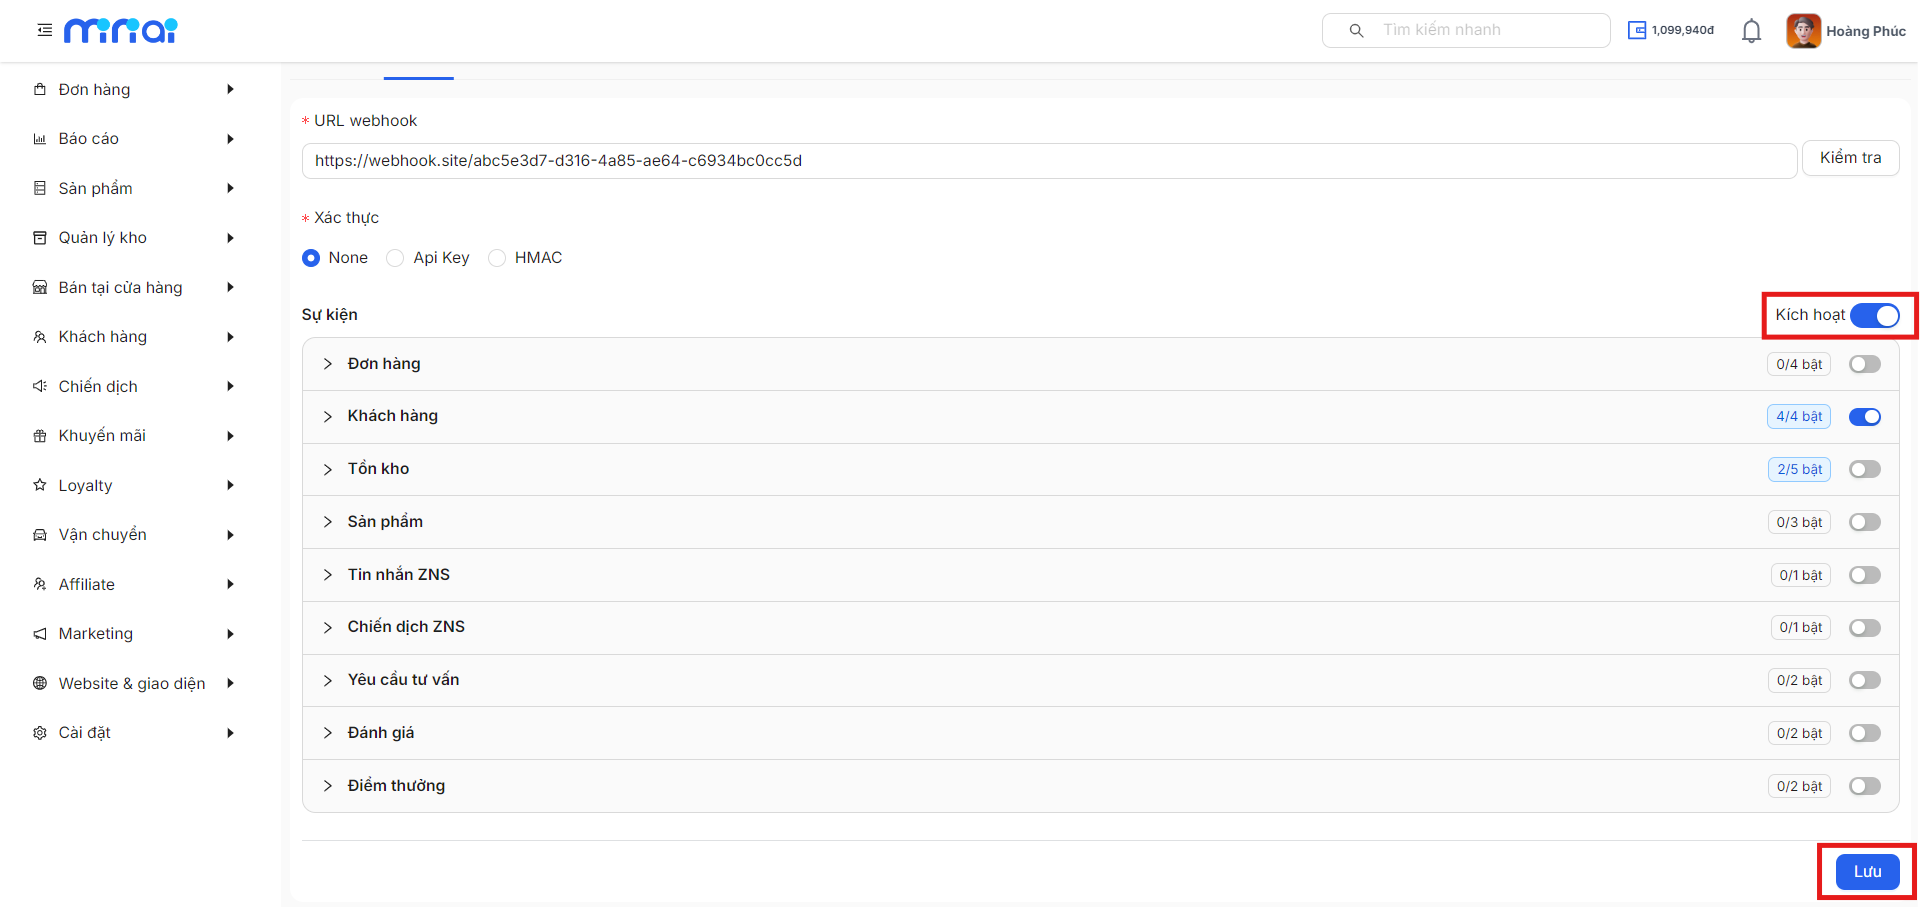
- Turn on the Activate switch (next to the "Events" heading) so the webhook starts working.
- Click Save at the bottom of the form to finish. Saving again later updates the existing configuration; it does not create a new webhook.
During integration, you can use a service like webhook.site to create a temporary receiving URL and inspect the payloads the system sends, before pointing to your real server.
To temporarily stop receiving notifications, just turn off the Activate switch and click Save — the URL, authentication and event configuration are kept so you can re-enable it later.
After activation, monitor delivery results in the Webhook Delivery History tab.